
‘64 Mercury Comet

One to upset the purists..
(If you’re anything like me, you’re wondering “Damn, how does a car look so badass with half the panels still missing!”)
Roger come to me quite early in the build wanting his classic bench seats modified and made to fit the raised tunnel on this mental Comet.
At first glance it was a fiarly straight forward job and build.. however the more we chatted, the more I began to realise the work and time he’d put into this build. Bagged all round, LS3 and all the fruit behind it for a great driving, performing and looking car.
We continued our chats and the job list grew, though it was merely a refresh to get it road worthy (if that’s even a possibility for this thing hah!) with the idea that once he could simply drive it back, it’d get an entire interior.
Mini c notch for the seat..
First up I began with sorting out the height in these seats.. it needed about 30-40mm to clear the tunnel in the front and easily 150mm in the rear. Though i’m a trimmer by trade, i still love getting in a dirty with a grinder and a welder. Making something fit that shouldn’t.
For strength well beyond what was needed, I used square hollow section for the front. Notched and bent to form the contour of the tunnel then finally welded into its final place within the seat rails. Unfortunately, both front and rear of the front seat needed these little notches simply to clear. Same too with the rear cushion and squab. However, the rear, as it was so reinforced from factory aswell as utilised the floor for strength in design, only needed some 10mm stainless round bar. Bent to the tunnel radius and finally welded to the seat frames.
Fresh flooring incoming..
With the seats finally able to sit in the car, I moved onto the flooring for the Comet. We landed on a gorgeous caramel as a contrast to the beige exterior and the future seat/door colours etc.
I began straight away on leveling the floor and tidying up loose ends before i could start on patterning it out.
I’ve always been a huge fan of incorporating contrast wherever possible. It breaks up the tones of the car and gives it a more well rounded and articulated design. So of course I included a beige vinyl binding throughout the flooring. Whilst being a fresh touch to the otherwise single coloured floor, it also accentuates the shape and contours of the car. Those being the gorgeous custom tunnel and borders on each side of the car.
Might i say.. what a result!
Last but not least..
Last item for this refresh was the roof. It was a classic bowed roof with windlacing that was looking a little sad and dirty. Though in good condition, these roofs can make or break a car in my opinion. I saw a good opportunity to bring more of this deep brown into the car.
Once the old roof was removed, it required a bit of surface rust clean up aswell as some rust protection and finally a little dyamat in the roof to remove the tinny audio from the car. Easy enough job but makes the world of difference.
Speaking of opportunity, as soon as this thing pulled in, I saw a chance to improve drastically upon a small piece from factory.
The B pillar trim covered the windlacing running through from front to back. I loved the look of this “pillarless” style to the way in which they had run the windlacing so I simply modified it to suit my vision. A very simple touch.. but could have easily been overlooked. What a shame that would have been!
Finally, I finished up with the visors and remaining pillars. Giving them a fresh vinyl skin and bound to match the theme to this interior.
Again, couldn’t be happier with the breath of life this bought into the otherwise lifeless interior. It’s amazing what a touch of colour and contrast can do for a dormant interior.
ROUND 2!
So after finishing his build and getting her on the road, it was finally time for me to finish off the interior for the Comet. With the seats looking worse for wear now we’d spruced up nearly everything else, it was finally time to get into their freshen up. We both decided that the factory style wasn’t actually all that bad but could simply use a fresher colour palette and a few minor tweaks.
Before all this could happen though, i needed to fix the horrible foam and spring situation beneath the covers. Essentially i began just gutting everything and anything I could. Knowing full well we could insert a wooden base with seat webbing and finally foam ontop of that. Have a look for yourself.


Slammed Seats..
As you can see, there was a tonne of work to do in simply lowering these seats to the customers requirements and still making them comfortable. Now I had the bare bones of a seat I began on pattern design. Using the factory covers as a rough guide I began crafting patterns and finalising the textures that would be incorperated.
Classic style..
For as long as I’ve been a trimmer, i’d wanted to do a buttoned seat in the style you’re about to see. Took a little bit of convincing from me to Roger but he trusted my judgement and knew we could be onto something great.. he wasn’t wrong.
After a solid week of pattering and sewing, they were finally done. I was absolutely pumped on the results, they came up better than i had anticipated. Check these out..


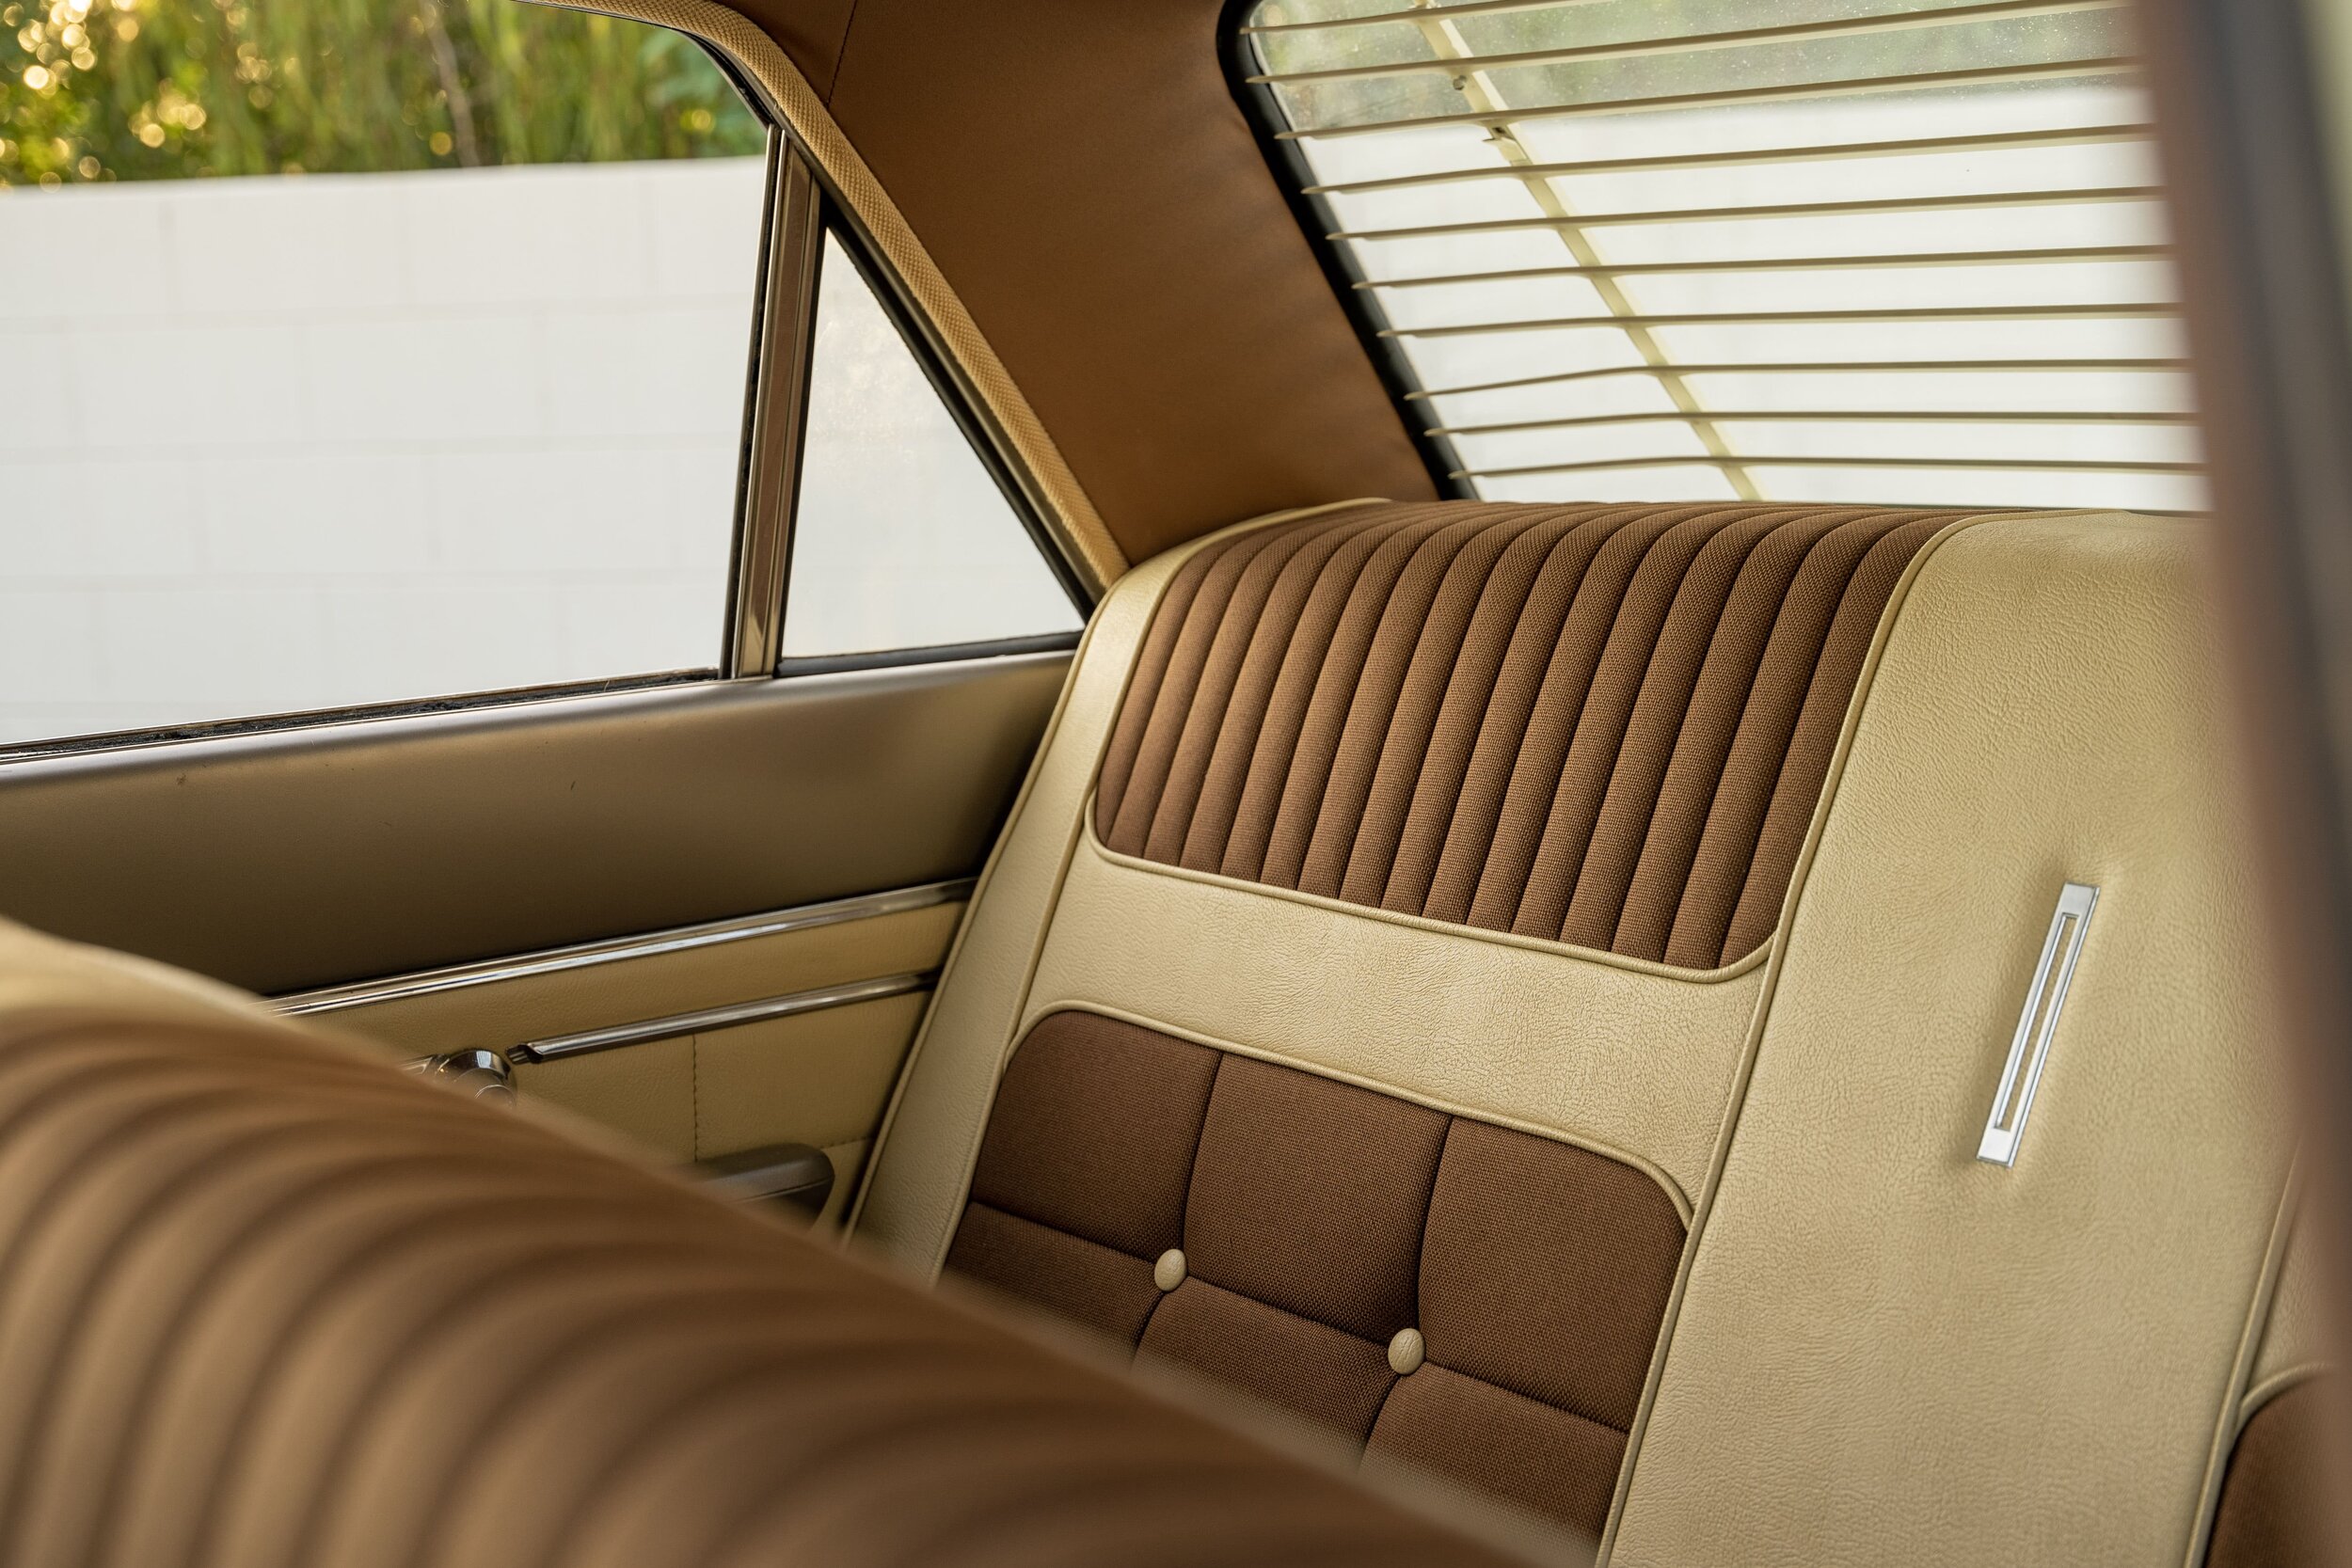


How good!..
They fit the car and its styling so well, honestly couldn’t have been happier with it all coming together the way it did. If you’d like to see more hit the Youtube vid for some up close and personal info and shots.